The methane filter (CH4) is a filter whose very narrow transmission is centered around one of the CH4 absorption band in the near infrared at 890 nm. That filter is very interesting because in contrary to all others, it does not reveal information relative to color differences (the albedo) but to the relative altitude of the cloud structures! The very low amount of available light will none the less ask you to take much care of the imaging technique…
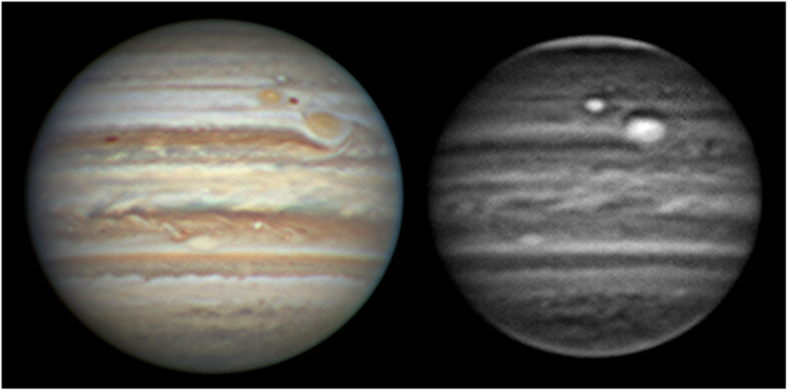
Which filter to choose ?
If you are not equipped yet, you will have to choose one filter, the best (with the largest band) being the most expensive. This can be a hard choice because the low light is really a problem.
The best filter on the market today is the CH4 IDAS (sold by Astro Hutech in the USA). This is the one that delivers the largest band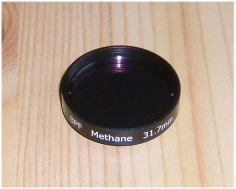
Then you find the Baader CH4. This one is noticeably cheaper (175 €). Its passband however is only 8 nm, twice less than the IDAS! It will be best used with instruments of at least 300 to 350 mm.
Finally one can get a CH4 filter from Edmund Optics. It is even cheaper (around 100 €) with a correct passband of 10 nm, but you would have to fit it in 31,75.
Find the correct sampling !
The difficulty of methane imaging should drive you to adjust your usual settings. The goal is to keep the exposure time below the second, and even if possible below half a second. For this you must change the sampling to match the needs of the methane filter. You have two ways to do this:
You can lower the effective focal length (with another barlow lens, or by using the prime focus of the instrument)
Or you can keep the same focal length but you will use the binning mode of the camera.
But aren’t you going to lose some resolution ? Not at all, because this methane band is found deep into the near infrared (almost near the end of sensitivity of the CCD!) and the resolution of the telescope is also reduced. It’s just not relevant to use the same sampling as usual. The diameter of the Airy disk is enlarged by almost 40 % (550/890… remember that the resolution is lower when the wavelength increases!)
My personal advice would be to keep the same optical imaging train as usual but to use the camera in binning 2x. This will save disk space, processing time, and you won’t have to unset anything.
Try to get an exposure around 0,5 to 0,7 at maximum, the limit being the maximum acceptable gain of the camera. It is not really a problem if the raw is under exposed, because we are going to use WinJupos (see below!)
Take a Dark frame
This is unavoidable. With an exposure of several hundredth of a second and a high gain, the image will show all the weird stuff with hot pixels and horizontal or vertical lining, that will be visible on the final image if you don’t remove a dark frame.
At the end of the CH4 Jupiter video, just shut the telescope and launch another video with the same parameters, but with only around 200 raw frames. Use the “Create Dark frame” function of Registax and save the result. Beware that you will have to adjust the luminosity of this dark image in order to avoid loss of real signal on the planet itself.
Use WinJupos
Absolutely essential !! WinJupos will allow you to use 1000 to 2000 raw frames instead of 100/200… the difference on the final result will be huge. The de-rotation technique to use is the video de-rotation.
Take a very long video. 10 mn is really a minimum to make profit of the advantage given by the software, but you can go even further. I’m routinely getting 15 mn SER files in CH4 but last year, F.Colas and M.Delcroix at the Pic du Midi went up to more than 30 mn !!
For the final image, choose the “stacked image” option, not the “corrected video”. Results look better, even if there is no possibility to select frames for the final stack (but in methane you will be likely to take them all anyway). Don’t forget to use the dark frame :).
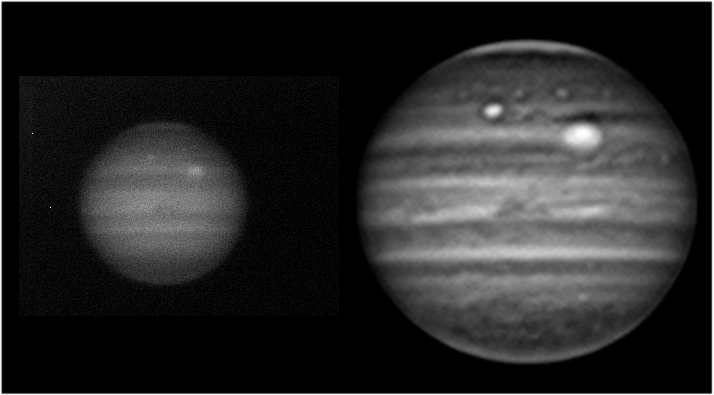
When processing the image, use the processing module of Registax 6;) Spline resizing to 200 %. (click on the image to enlarge)

3 Comments
Ah thank you! The equipment is evolving fast and so must our techniques.
Hello Mark,
What is true for every filter is true for CH4 as well: the key is always a compromise between frame rate and the histogram: go as fast as you can unless each raw frame become too noisy for the final result. CH4 is just more sensitive than other filters. This is why you can’t go as fast with it. The best advice is to accept a lower histogram than for classical visible imaging (and then a faster frame rate than “reasonable”) and to make very long WinJupos derotation (15 to 30 mn).
This is because if the dark is too bright, the brightness level of the equatorial edges of Jupiter will be at the same level than the dark, and so will be erase in the final image. However, with modern CMOS cameras, you can use faster frame rates than before, and you can forget to use dark frames. I’m not using them anymore !
Salut Christophe.
Thanks for the excellent resources your site provides!
I was doing some CH4 imaging lately. I have two questions:
If I bin I can get quite high frame rates with exposures around 20 ms but is it in fact desirable to have longer exposures for CH4 – like deep sky imaging – or shoukd c we still seek to maximize frame rate as for normal planetary imaging?
Secondly, I haven’t used darks yet for CH4. I could not understand your comment: “Beware that you will have to adjust the luminosity of this dark image in order to avoid loss of real signal on the planet itself.” Could you please explain this?
Mark (Lacaille from CN).